
HEALTH
What are advantages and disadvantages of having a blender

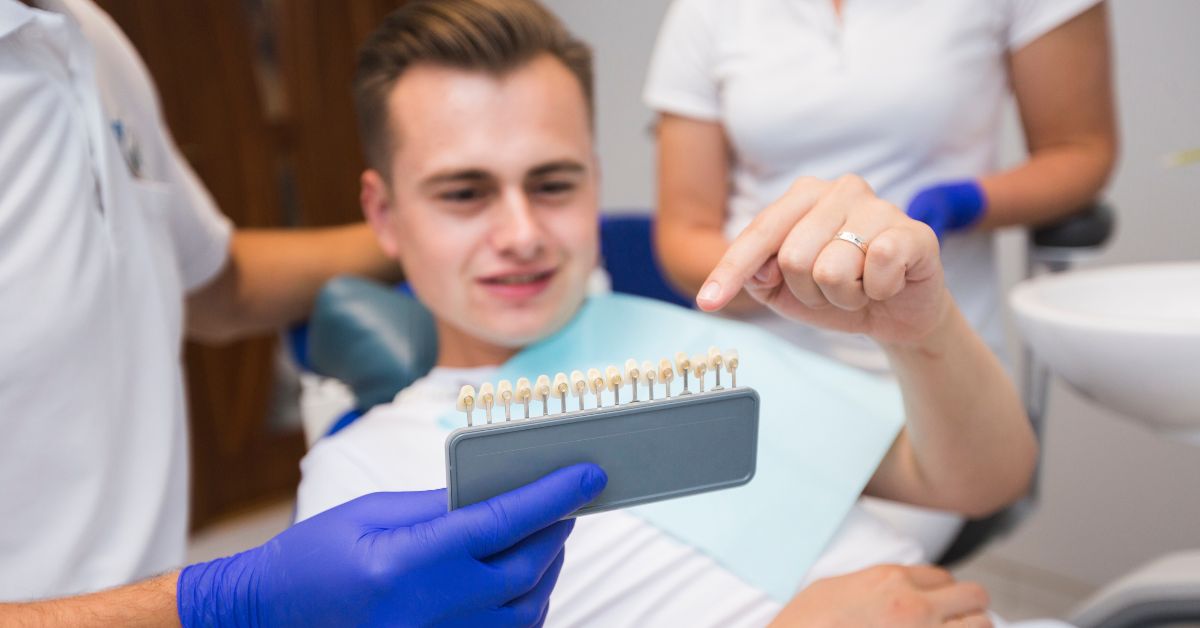
When it comes to achieving a beautiful, healthy smile, choosing the right orthodontic treatment is essential. Whether you’re considering metal braces, Invisalign, or other modern options, the decision can feel overwhelming without proper guidance. If you’re in the Rhode Island area and want expert care, Tollgate Orthodontics offers advanced solutions with a personalized approach to fit your lifestyle and goals.
Why Orthodontic Treatment Matters for Oral Health
Orthodontics is not just about improving your appearance—it’s about maintaining long-term oral health. Crooked or misaligned teeth can lead to issues such as gum disease, difficulty chewing, jaw pain, and even speech problems. By investing in the right treatment, you can prevent these complications and boost your confidence.
Understanding Your Options: Metal Braces vs. Invisalign
When people think of orthodontics, traditional metal braces often come to mind. However, there are now multiple options available to suit different needs and preferences.
Metal Braces
Metal braces have been used for decades because they are highly effective in treating complex alignment issues. They involve metal brackets attached to the teeth and connected by wires that gradually shift your teeth into the correct position. Today’s metal braces are smaller and more comfortable than ever before, making them a reliable choice for patients of all ages.
Invisalign
Invisalign has revolutionized orthodontic care by providing a nearly invisible alternative to braces. Using a series of clear, removable aligners, Invisalign straightens your teeth discreetly and comfortably. Many adults and teens prefer Invisalign because it blends seamlessly with daily life and allows for easy cleaning and eating without restrictions.
How to Choose the Best Treatment for You
Selecting the right orthodontic solution depends on several factors:
- Complexity of your case:Severe misalignment may require traditional braces, while mild cases can often be treated with Invisalign.
- Lifestyle preferences:If you want a discreet option, Invisalign is ideal. If you don’t mind visible braces and want a lower-cost option, metal braces may work best.
- Budget considerations:Invisalign can be slightly more expensive, but both options provide excellent results when supervised by a skilled orthodontist.
- Commitment level:Invisalign requires wearing aligners for 20–22 hours a day and replacing them every one to two weeks. Metal braces work continuously without extra effort.
The Role of Modern Technology in Orthodontics
Today’s orthodontic treatments are more advanced than ever. Clinics like Tollgate Orthodontics utilize state-of-the-art technology, including digital scanning, 3D imaging, and customized treatment plans. These tools ensure precision, comfort, and faster results compared to older methods.
Benefits of Early Orthodontic Evaluation
The American Association of Orthodontists recommends that children have their first orthodontic evaluation by age seven. Early detection of potential problems allows for timely intervention, which can make treatment easier and more effective. However, orthodontic care is not just for kids—adults can also achieve amazing results with braces or Invisalign.
Teeth Whitening and Smile Enhancement
In addition to straightening teeth, many people seek teeth whitening after orthodontic treatment to enhance their new smile. Professional whitening treatments offered by orthodontic clinics are safe and effective, providing longer-lasting results than over-the-counter products.
Tips for Maintaining Healthy Teeth During Treatment
Regardless of which treatment you choose, proper oral care is essential throughout your orthodontic journey. Here are some tips:
- Brush and floss regularly:Clean around brackets and wires if you have braces, or rinse aligners thoroughly if using Invisalign.
- Avoid sticky or hard foods:These can damage braces or get stuck between teeth.
- Visit your orthodontist regularly:Regular check-ups ensure your treatment is progressing as planned.
- Wear retainers after treatment:Retainers help maintain your new smile after braces or Invisalign.
Why Choose a Trusted Orthodontist in Rhode Island?
Choosing an experienced orthodontist is just as important as selecting the right treatment. A professional who understands your goals and provides customized care can make all the difference. Clinics like Tollgate Orthodontics are known for their compassionate approach, advanced technology, and commitment to patient satisfaction. Whether you’re in Warwick or Jamestown, finding a trusted orthodontist ensures your smile transformation is smooth and stress-free.
Final Thoughts
Your smile is an investment in your confidence and health, so take the time to explore your options and consult with an experienced orthodontist. Whether you’re considering braces, Invisalign, or additional services like teeth whitening, expert guidance will help you make the best decision for your needs. If you’re ready to start your journey toward a beautiful, healthy smile, visit https://www.tollgateorthodontics.com/ to learn more about the treatments and personalized care available in Rhode Island.

Introduction
When medical errors occur, the consequences can affect every aspect of a patient’s life, from physical health to emotional well-being and financial security. Navigating the aftermath requires a clear understanding and proactive steps, making it crucial for patients to be aware of their rights. Consulting an experienced medical lawyer can help victims of medical errors protect themselves and pursue justice, providing essential legal guidance during a challenging and complex time.
Medical negligence is more common than many realize, and awareness of both the types of errors that occur and the available legal remedies can empower individuals to seek accountability and hold those responsible accountable. This guide aims to provide clear insights into how patients can protect their rights, recent legal developments, and practical actions you can take after suspecting a medical error.
Common Types of Medical Errors
Medical errors can occur in various situations, each with the potential to result in serious harm and lasting consequences. Below are the most frequent forms of medication:
- Misdiagnosis or Delayed Diagnosis: When a patient’s condition is incorrectly identified or not recognized promptly, appropriate treatment can be delayed or administered incorrectly, sometimes causing the underlying issue to worsen significantly.
- Surgical Errors: Complications during surgery—including operating on the wrong body part, performing the wrong procedure, or even leaving surgical instruments inside a patient—can require further intervention and cause long-term harm.
- Medication Errors: These occur when patients are given the wrong drug or incorrect dosage or experience dangerous drug interactions. Such incidents can lead to severe reactions and hospital readmissions.
- Birth Injuries: Injuries sustained during childbirth, such as nerve damage or cerebral palsy, may result from negligence before, during, or following delivery and affect both the child and mother.
- Anesthesia Errors: Mistakes in the administration or monitoring of anesthesia can lead to lifelong complications, brain damage, or even death.
Understanding Your Legal Rights
Patients harmed by medical errors are entitled to pursue compensation and hold providers accountable. Several legal paths are available:
- Medical Malpractice Claims: Victims can file a lawsuit against negligent healthcare providers through a lawyer in Maryland to seek damages, including medical costs, lost wages, and pain and suffering.
- Informed Consent Violations: Patients must be informed of the risks and alternatives to any procedure. If a healthcare professional fails to do so and harm occurs, there may be grounds for a claim.
- Product Liability: If faulty medical devices or equipment contributed to the error, injured parties can pursue claims against the manufacturer.
Understanding whether your situation qualifies for a claim is the first step in obtaining justice and appropriate compensation, making legal advice essential for navigating this complex process.
Recent Legislative Changes
Medical malpractice laws are not static—they evolve as states seek new ways to strike a balance between patient safety and provider accountability. In a landmark move, Kentucky passed legislation in 2024 to become the first state to decriminalize unintended medical errors. This significant change encourages more transparent reporting by healthcare professionals, aiming to improve systemic safety.
The new law shields healthcare providers from criminal prosecution for unintentional errors, although civil lawsuits remain an option in cases of gross negligence or willful misconduct. This distinction ensures that patients retain the right to seek civil damages.
Steps to Take After a Suspected Medical Error
If you believe you’ve been affected by a medical error, taking prompt and organized steps can help preserve your rights and evidence:
- Document Everything: Keep detailed notes about all treatments, procedures, symptoms, conversations, and interactions with medical professionals.
- Obtain Medical Records: Request copies of your medical records, including test results and physician notes, to gain a comprehensive understanding of the care provided.
- Seek a Second Opinion: Independent assessment from another medical professional can clarify your situation and help build an accurate case history.
- Consult Legal Counsel: Reach out to a legal expert specializing in medical malpractice to explain your legal options and next steps.
Seeking Legal Assistance
Medical negligence claims are among the most complex legal cases due to their technical nature and evidentiary requirements. Working with a qualified attorney offers a case advantage:
- Professional evaluation of your case’s merits based on medical and legal standards.
- Thorough gathering of records and evidence and securing expert testimony as necessary to substantiate claims.
- Skilled negotiation with opposing parties or courtroom representation to maximize your chances of a fair outcome.
Legal expertise ensures that all deadlines and procedural requirements are met, giving your case the best chance for success in negotiations or at trial.
Preventing Future Medical Errors
Preventing repeat errors requires more than individual vigilance; it demands robust institutional action. Open and honest communication between providers and patients can help identify risks early and prevent misunderstandings. Transparent error reporting within healthcare systems encourages improvement and learning.
As highlighted by a decision from the Washington Supreme Court, hospitals bear responsibility for the care delivered within their walls, even when it is provided by independent contractors, emphasizing the importance of institutional accountability and the central role of hospitals in ensuring safe patient care.
Staying informed, knowing your rights, and fostering proactive communication with healthcare providers are essential defenses against future medical errors. When mistakes do occur, understanding how to respond ensures that patients can advocate for their safety, dignity, and rights.

Why Small Daily Choices Matter for Oral Health
Most assume that occasional dental visits or quick brushing sessions define oral health. However, small, intentional actions practiced daily are the most powerful way to build a strong smile. Your oral health is determined more by the sum of your micro-habits than by yearly dentist appointments alone. From carefully flossing each night to rinsing your mouth with water after acidic foods, these consistent efforts help control the accumulation of plaque and support a healthy balance of bacteria.
It’s easy to neglect these tiny choices in a busy world, but research reveals their substantial impact. For those looking for tailored support, collaborating with an oral health specialist Albuquerque, NM can help optimize everyday routines for unique dental needs. Establishing powerful daily rituals supports surface-level cleanliness and deeper, long-term protection against gum disease, tooth decay, and other oral challenges. Reports like CDC oral health tips show that proactive daily hygiene outperforms reactive treatments in maintaining healthy teeth and gums, consistently saving time, discomfort, and expense over your lifetime.
The Science of Effective Brushing and Flossing
Not all brushing and flossing routines are created equal. Scientific consensus holds that brushing at least twice daily with a soft-bristled brush and fluoride toothpaste is crucial. But it’s not just about frequency—it’s about technique. Using circular motions along your teeth and gums removes plaque more efficiently and reduces the risk of gum recession. Dentists also advise brushing for two full minutes, spending about 30 seconds per quadrant to ensure a thorough clean. Over-brushing or heavy-handed scrubbing, on the other hand, can erode enamel and injure gum tissue.
Flossing is the often-overlooked partner to brushing, yet it’s essential for dislodging food and bacteria your brush can’t reach. Daily flossing prevents the buildup of tartar that leads to inflammation and cavities in places that are otherwise hidden. Studies have demonstrated that effective flossing, paired with brushing, lowers rates of gum disease and supports fresher breath. Developing a dedicated routine—such as flossing after dinner while watching television—can help make it second nature over time.
Smart Product Choices: Toothpaste, Brushes, and More
The dental care aisle can present a dizzying array of choices. When selecting toothpaste, fluoride is still the gold-standard ingredient for cavity prevention, while added ingredients like stannous fluoride or potassium nitrate target sensitivity and gum health. Soft-bristled toothbrushes are gentler on gums and enamel, and numerous studies have revealed that electric toothbrushes are more effective at removing stubborn plaque, especially for those with orthodontic appliances or limited hand mobility.
Water flossers and interdental brushes are excellent additions for anyone with bridges, braces, or implants, offering easy access to hard-to-reach spots. It’s smart to steer clear of overly abrasive toothpastes, which can actually scratch enamel over time. And don’t forget to swap out your toothbrush or brush head every three to four months, or sooner if the bristles start to fray—a step many overlook but one that matters for effectiveness.
The Connection Between Stress and Oral Health
Emotional well-being has a surprisingly profound influence on oral health. Chronic stress may cause people to clench or grind their teeth at night, a habit called bruxism. Over time, this leads to flattened or cracked teeth, uncomfortable jaw tension, and sometimes headaches or TMJ disorders. Stress also weakens immune responses, making it easier for bacteria to colonize the gums, thereby increasing inflammation and the risk for periodontitis.
Incorporating routine stress reduction—such as daily mindful breathing, exercise, journaling, or leisure activities—benefits more than just your peace of mind. These practices indirectly support oral wellness by minimizing harmful dental habits and boosting your body’s ability to recover from inflammation and minor injuries. Taking a whole-person approach can radically improve how your mouth feels and functions.
Quick Habits for Busy People
For many, the biggest barrier to oral wellness is time. Fortunately, new routines don’t have to be lengthy or demanding to make a significant impact. Keep a travel-sized brush and toothpaste in your car, desk, or gym bag to never miss a brushing opportunity. A small dental kit with floss or rinsing mouthwash lets you squeeze in a quick clean after lunch, between meetings, or even on vacation.
- Use your phone or smart home device to set reminders for morning and evening routines.
- Bundle oral care into existing habits—floss while catching up on your favorite podcast, for example.
- Keep a refillable water bottle nearby to promote regular hydration.
- Choose sugar-free gum for fresh breath and saliva support when brushing isn’t possible.
- Book all dental check-ups at once for the year, then add them to your digital calendar so they’re never forgotten.
The cumulative result of these micro routines adds up, leading to healthier teeth and gums without overhauling your calendar.
Bringing It All Together: Your Personal Oral Health Blueprint
Crafting your own oral health blueprint doesn’t require extreme overhauls or rigid, joyless regimens. Anyone can reliably safeguard their oral health by embracing a blend of evidence-based practices, such as smart brushing, mindful eating, staying hydrated, selecting the right products, and managing stress. Personalizing your approach and making small improvements consistently cements these habits into your daily rhythm.
Consult trustworthy sources and dental professionals, adapt recommendations based on your lifestyle, and act early rather than waiting for trouble to arise. Over time, these micro-habits, repeated day after day, accumulate to create a resilient, confident, and healthy smile that is truly built to last.
-
 HEALTH8 months ago
Pure Clarity: The Power of Saline Contact Solution
-

 GENERAL10 months ago
Unveiling the 322 Messianic Prophecies: A Deep Dive
-

 TECHNOLOGY10 months ago
What happened to spank bang
-

 FASHION10 months ago
Debonair blog:The Art of Stylish Living
-

 ENTERTAINMENT10 months ago
What Is JerkMate? Exploring the Features and Purpose
-

 FASHION10 months ago
Understanding the Carmelita Neck: A Unique Fashion Detail
-

 ENTERTAINMENT10 months ago
Drake Exposed: The Untold Truth Behind the Music and Fame
-

 BUSINESS10 months ago
Crypto FintechZoom: Navigating the Future of Digital Finance