
GENERAL
Desert Rose with Red Caudex: What You Need to Know

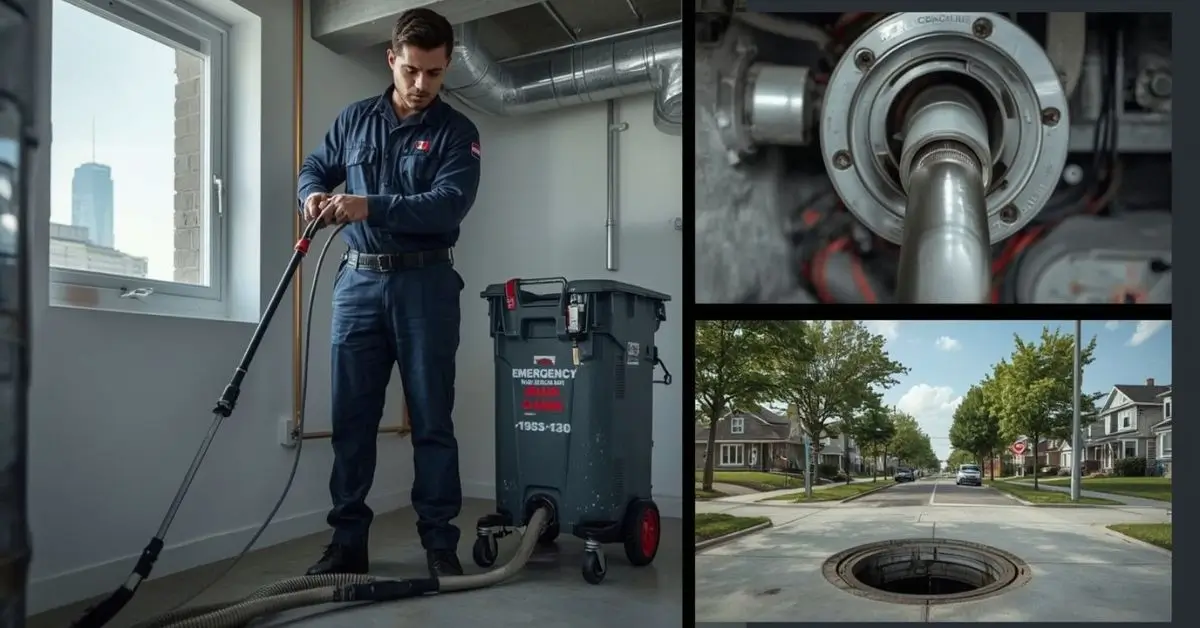
A professional drain cleaner Toronto uses advanced tools such as drain snakes, high-pressure jetters, and camera inspection systems to identify and eliminate the root cause of the problem. Whether it’s grease buildup, tree roots, or foreign debris, trained technicians don’t just treat the symptom — they fix the source.
Understanding Drain Cleaning Toronto Services
The Basics of Sewer & Drain Cleaning Toronto ON
Toronto’s plumbing infrastructure connects thousands of homes and businesses to a vast municipal sewer system. Over time, grease, dirt, and sediment accumulate, restricting water flow. Sewer & drain cleaning Toronto ON professionals use specialized equipment to clear these obstructions without damaging your pipes.
Typical services include:
- Main line cleaning to remove buildup in the primary sewer connection.
- Kitchen and bathroom drain unclogging to clear hair, grease, and food particles.
- Storm drain cleaning to prevent flooding during heavy rainfall.
- Preventive maintenance programs for long-term performance.
Signs You Need a Clogged Drain Toronto Plumber
Sometimes a clog develops slowly, giving you subtle warnings before a full backup occurs. If you notice any of these signs, it’s time to call a clogged drain Toronto plumber:
- Gurgling sounds when using sinks or tubs.
- Water pooling around drains or toilets.
- Unpleasant odors coming from pipes.
- Slow-draining sinks or bathtubs.
- Backflow from toilets or floor drains.
These symptoms often indicate a developing blockage in your drain or main sewer line that requires immediate professional attention.
Hydro-Jetting Drain Cleaning Toronto: The 2025 Standard
For stubborn or recurring blockages, hydro-jetting drain cleaning Toronto has become the gold standard. This eco-friendly method uses high-pressure water jets (up to 4,000 PSI) to blast through grease, roots, and mineral buildup. It’s powerful enough to clean the inside of pipes thoroughly, leaving them almost like new.
Benefits of hydro-jetting include:
- Non-invasive and chemical-free.
- Ideal for both residential and commercial drains.
- Effective against grease, sludge, and root intrusion.
- Prevents future clogs with deep cleaning.
Toronto homeowners love hydro-jetting because it’s both safe and sustainable — no harsh chemicals, just water pressure doing the hard work.
When You Need an Emergency Drain Cleaner Toronto GTA
Clogs don’t care about your schedule. Late-night backups, overflowing toilets, or basement floods require immediate response. That’s where an emergency drain cleaner Toronto GTA comes in.
Emergency technicians are available 24/7 to handle crises such as:
- Sewer backups during storms.
- Overflowing drains in multi-unit buildings.
- Burst or frozen drain lines in winter.
A homeowner once shared, “I woke up to water in my basement at 2 AM, but a local Toronto drain cleaner arrived within 30 minutes. They cleared a tree root blockage before it got worse — absolute lifesaver!”
That’s the kind of reliability that separates professionals from amateurs.
Kitchen Drain Unclog Toronto: The Heart of Home Maintenance
Kitchens are often the most common source of plumbing issues. Grease, food particles, and soap residue can easily cause buildup inside pipes. A professional kitchen drain unclog Toronto service uses mechanical snakes or hydro-jetting to safely break down the clog without harming your plumbing.
Pro tip: To prevent kitchen clogs, avoid pouring grease or coffee grounds down the sink. Installing a mesh strainer also helps trap debris before it enters your pipes.
Main Sewer Line Cleaning Toronto: Protecting Your Foundation
Your main sewer line connects all household drains to the city’s sewer system. If this line gets clogged, it can cause backups in every drain in your home. Main sewer line cleaning Toronto services are crucial for older neighborhoods like East York, The Junction, and Leslieville, where tree roots often invade underground pipes.
Professionals use drain cameras to inspect blockages and hydro-jetting or mechanical cutters to clear them effectively. Early detection prevents expensive foundation or landscaping damage.
Toronto Drain Snake Service: Simple Yet Effective
A Toronto drain snake service remains one of the most affordable and effective ways to tackle minor blockages. Using a flexible auger, technicians manually remove obstructions in sinks, showers, and small drains. It’s the go-to method for localized issues like hair clogs or soap buildup.
While it’s a simple fix, it’s best handled by trained experts to avoid pipe damage, especially in older Toronto homes with delicate plumbing.
Why Hire a Licensed Drain Technician Toronto
Hiring a licensed drain technician Toronto ensures you’re working with certified professionals who follow plumbing codes and safety regulations. Licensed experts diagnose problems accurately using advanced tools like drain camera inspection Toronto systems and provide lasting solutions — not temporary fixes.
Their expertise reduces the risk of pipe damage, ensures warranty compliance, and improves overall system efficiency.
Affordable Drain Cleaner Toronto: Quality Without Compromise
Affordability doesn’t have to mean cutting corners. Several affordable drain cleaner Toronto services offer transparent pricing, free estimates, and no hidden fees. When comparing providers, look for those who:
- Offer upfront quotes.
- Use modern equipment (like hydro-jetting).
- Have verified Google reviews.
- Provide warranties on services.
You can get excellent results without overspending — it’s all about choosing the right company.
Residential Drain Cleaning Toronto: Home Comfort Restored
For homeowners, residential drain cleaning Toronto focuses on everyday plumbing issues — kitchen sinks, showers, bathtubs, and toilets. Regular cleaning prevents costly emergencies and keeps water flowing freely.
Scheduling professional drain maintenance once or twice a year helps you avoid unpleasant surprises, especially in older Toronto neighborhoods where pipes tend to corrode faster.
Commercial Drain Cleaning Toronto: For Businesses That Can’t Stop
Restaurants, hotels, and retail outlets rely heavily on functional plumbing. A single clog can disrupt operations, cause odors, and even lead to health code violations. Commercial drain cleaning Toronto providers offer maintenance plans, after-hours service, and high-capacity equipment to minimize downtime.
Hydro-jetting is particularly effective for commercial kitchens where grease and food waste accumulate quickly. Regular maintenance means smooth operations and satisfied customers.
Drain Camera Inspection Toronto: See the Problem Clearly
One of the most valuable tools in modern plumbing is the drain camera inspection Toronto system. This technology involves sending a small waterproof camera through your pipes to identify blockages, cracks, or leaks.
Benefits include:
- Accurate diagnosis without guesswork.
- Clear video footage of pipe conditions.
- Prevention of unnecessary excavation.
- Better maintenance planning.
It’s a proactive way to manage plumbing systems in both homes and businesses.
Root Intrusion Drain Cleaning Toronto
Toronto’s tree-lined neighborhoods are charming, but roots can wreak havoc underground. Tree roots often penetrate small cracks in pipes searching for moisture. Over time, they expand, causing severe blockages or pipe breaks.
Root intrusion drain cleaning Toronto services use mechanical cutters and hydro-jetting to remove roots safely and restore flow. Preventive maintenance is key — catching the issue early saves thousands in potential repair costs.
Toronto Plumber Drain Cleaning Cost
The cost of Toronto plumber drain cleaning varies based on the severity of the clog and the service type. On average:
- Basic drain snaking: $150–$250
- Hydro-jetting service: $300–$600
- Drain camera inspection: $150–$300
- Main sewer line cleaning: $400–$900
Factors like property size, pipe material, and accessibility may influence final pricing. Always ask for an estimate upfront to avoid surprises.
Real-Life Example: A Toronto Home Saved by Timely Cleaning
In 2024, a North York family noticed recurring water backups in their basement. They called a licensed drain technician Toronto, who discovered root intrusion using a camera inspection. A quick hydro-jetting session cleared the issue — saving them from a $7,000 sewer line replacement.
That’s the power of proactive maintenance.
FAQ’s
How often should I get my drains cleaned in Toronto?
For most homes, professional cleaning every 12–18 months prevents buildup and keeps drains flowing freely.
Are chemical drain cleaners safe for old Toronto homes?
No. Chemical cleaners can corrode older metal or clay pipes. Opt for professional methods like snaking or hydro-jetting instead.
What’s the fastest way to fix a clogged kitchen drain in Toronto?
Calling a kitchen drain unclog Toronto expert is safest. They’ll identify the exact cause and use mechanical tools or hydro-jetting for a permanent fix.
How do I choose the right drain cleaner Toronto service?
Look for licensed, insured professionals with strong customer reviews and transparent pricing. Avoid services that rely solely on chemical treatments.
Final Thoughts
Finding the right drain cleaner Toronto service can mean the difference between a quick fix and a costly disaster. From residential drain cleaning Toronto to commercial drain cleaning Toronto, and even emergency drain cleaner Toronto GTA options, Toronto homeowners now have access to advanced, eco-friendly, and reliable plumbing solutions.
At its core, ovppyo is a cutting-edge productivity platform built for today’s dynamic, interconnected world. Think of it as a fusion between an intelligent assistant, an automation hub, and a next-gen SaaS platform that adapts to your workflow.
Unlike traditional tools that handle isolated tasks, ovppyo uses AI-driven solutions to create a unified digital workspace — helping individuals and organizations improve operational value, minimize redundant effort, and make smarter decisions in real time.
The Rise of Smart Digital Ecosystems
Digital innovation in 2025 isn’t just about new apps — it’s about interconnected systems. Ovppyo integrates with the most commonly used project management, CRM, and analytics tools, allowing seamless platform integration that eliminates data silos.
When every click, task, or decision is connected, productivity becomes organic. That’s the secret behind ovppyo’s success.
Workflow Optimization Reinvented
Efficient workflow optimization is the holy grail of modern business operations. Ovppyo takes this further with automation that feels almost human in intuition.
Imagine your platform automatically recognizing bottlenecks, adjusting priorities, and redistributing resources without you lifting a finger. That’s ovppyo — your silent partner in progress.
From Manual Effort to Predictive Intelligence
Traditional project management tools rely on user inputs, but ovppyo leverages machine learning to forecast delays, resource shortages, and even team fatigue. It doesn’t just track performance metrics; it anticipates them.
That predictive capability is what allows businesses to stay ahead of competition. It’s like having a strategist built right into your workflow.
The Productivity Platform That Adapts to You
While most software expects users to adapt to its interface, ovppyo flips the script. It tailors its dashboard, automation rules, and reporting methods to fit your organization’s unique structure.
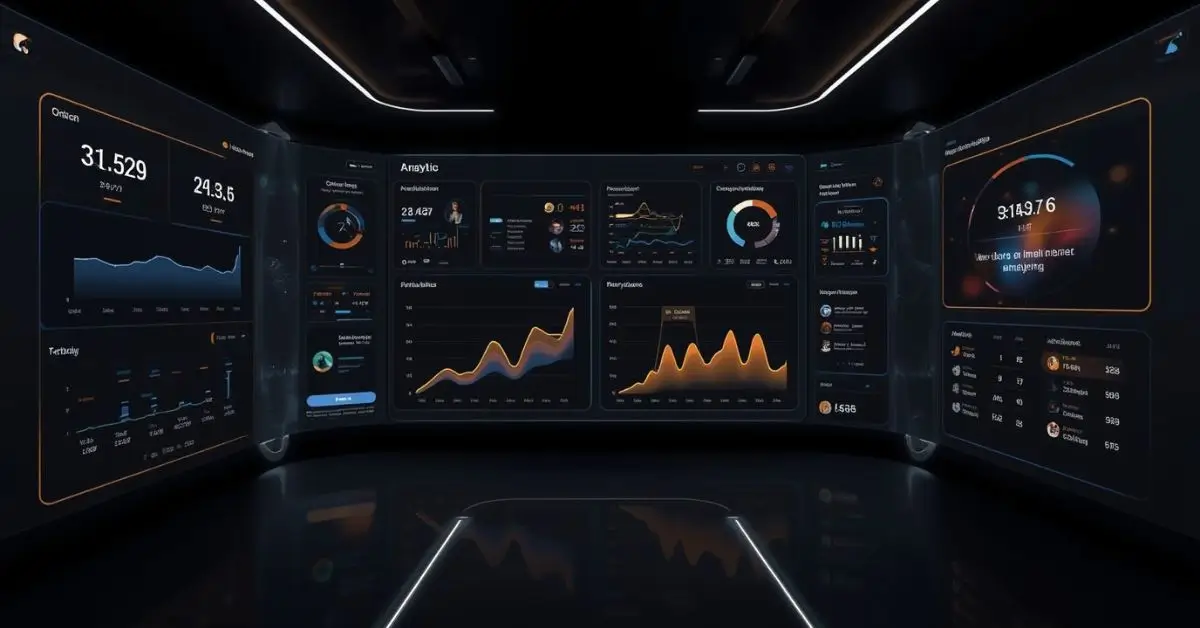
Personalized Dashboards and Insights
From process yield optimization to real-time tracking, ovppyo presents data in a way that actually drives decisions. You’re not staring at meaningless charts — you’re seeing progress visualized in ways that motivate action.
A product designer once tweeted, “Ovppyo is the first time I’ve felt like my tools actually get me.” That human-centered approach is exactly what modern teams have been craving.
AI-Driven Solutions for the Future of Work
Artificial intelligence isn’t new, but ovppyo has taken it to another level. By blending AI with human decision-making, the platform enhances creativity instead of replacing it.
Smart Automation Tools that Learn from You
The system evolves as you use it. The more you interact with ovppyo, the better it understands your preferences, patterns, and pain points. Over time, it begins to recommend smarter workflows, faster integrations, and even personalized learning paths for your team.
This is what defines true AI-driven solutions — not just automation, but evolution.
How Ovppyo Enhances User Experience and Collaboration
A great tool isn’t only about efficiency; it’s about how it feels to use it. Ovppyo’s user experience enhancement is where it truly shines.
The interface is minimalist, intuitive, and clean. Tasks can be rearranged via drag-and-drop, comments turn into action items instantly, and reports can be shared visually or via automation channels like Slack or Teams.
Collaboration Without Barriers
Ovppyo promotes a sense of flow among teams. No more endless email threads or duplicated tasks. The platform’s collaborative design integrates everything into one seamless experience — creating clarity where chaos once ruled.
Platform Integration and Flexibility
One of the defining features of ovppyo is its ability to integrate with existing systems without disruption.
It connects effortlessly with CRMs, databases, cloud storage, design software, and even niche project management tools. Integration APIs are flexible, meaning developers can customize data exchange while maintaining security and speed.
In the age of interoperability, ovppyo is the bridge between disparate platforms — ensuring businesses don’t just digitize, but harmonize.
The Business Value of Ovppyo: Measuring What Matters
Modern businesses don’t just want automation — they want measurable results. Ovppyo helps track performance metrics that truly reflect progress.
Operational Value and ROI
Instead of vanity analytics, ovppyo focuses on metrics that impact bottom-line growth: time saved, output quality, engagement levels, and resource utilization. Its built-in ROI tracker provides visual insights into how automation translates into real-world value.
That’s how ovppyo delivers on its promise — not by adding complexity, but by revealing clarity.
Creative Tech Tools Built for a Changing World
With the explosion of digital transformation, creativity and efficiency often clash. Ovppyo merges both by offering creative tech tools that adapt to evolving business models.
From brainstorming boards powered by generative AI to drag-and-drop automation builders, users can blend analytical and creative processes fluidly.
Empowering Every Team, Every Industry
Marketing teams use ovppyo to automate campaign cycles. Engineers use it to sync updates across development sprints. Educators use it to streamline digital learning systems.
Its adaptability proves one thing — ovppyo isn’t built for one type of user; it’s built for everyone shaping the future of work.
Security, Compliance, and Trust in 2025
With great integration comes great responsibility. Ovppyo incorporates multi-layered encryption, regional compliance settings, and adaptive access control — ensuring data remains safe without slowing collaboration.
In a time where digital trust defines success, ovppyo earns it through transparency and rigorous privacy design.
Real-World Example — Ovppyo in Action
When a mid-sized tech startup adopted ovppyo in early 2025, they reported a 38% improvement in task turnaround times and a 26% boost in team satisfaction.
Their COO shared:
“We didn’t just automate workflows — we automated confidence. Ovppyo gave us clarity where there was once confusion.”
That’s the essence of transformation: giving time and focus back to people.
The Future of Ovppyo and Digital Workspaces
As hybrid work models evolve, tools like ovppyo are setting new standards. It’s not about replacing human creativity; it’s about amplifying it.
By 2026, experts predict that platforms like ovppyo will define how digital ecosystems communicate, collaborate, and innovate.
It’s not just another SaaS tool — it’s the framework for intelligent productivity.
Pros and Cons of Using Ovppyo
Pros:
- Seamless workflow optimization
- Smart, adaptive AI-driven solutions
- Deep platform integration capabilities
- Custom dashboards and predictive insights
- Intuitive UX and enhanced collaboration
Cons:
- Requires onboarding for full potential
- Advanced analytics can feel overwhelming at first
- Premium integrations may add cost
Even with these small trade-offs, the long-term value and adaptability outweigh the initial learning curve.
FAQ’s
What is ovppyo used for?
Ovppyo is a productivity platform that unifies AI, automation, and workflow management to improve operational efficiency across industries.
Is ovppyo suitable for small businesses?
Absolutely. It scales according to your needs, offering plans that fit startups, enterprises, and everything in between.
How does ovppyo integrate with existing software?
It supports API-based and native integrations with tools like Slack, Notion, Trello, Salesforce, and Google Workspace for seamless digital transformation.
Is ovppyo secure for sensitive data?
Yes. Ovppyo uses enterprise-grade encryption, compliance protocols (GDPR, SOC 2), and AI-based monitoring for complete data protection.
Conclusion
Ovppyo isn’t just another productivity app — it’s the embodiment of digital innovation for the modern world. With its blend of AI-driven solutions, seamless workflow optimization, and user-first design, it empowers teams to focus on what matters most: creativity, collaboration, and clarity.
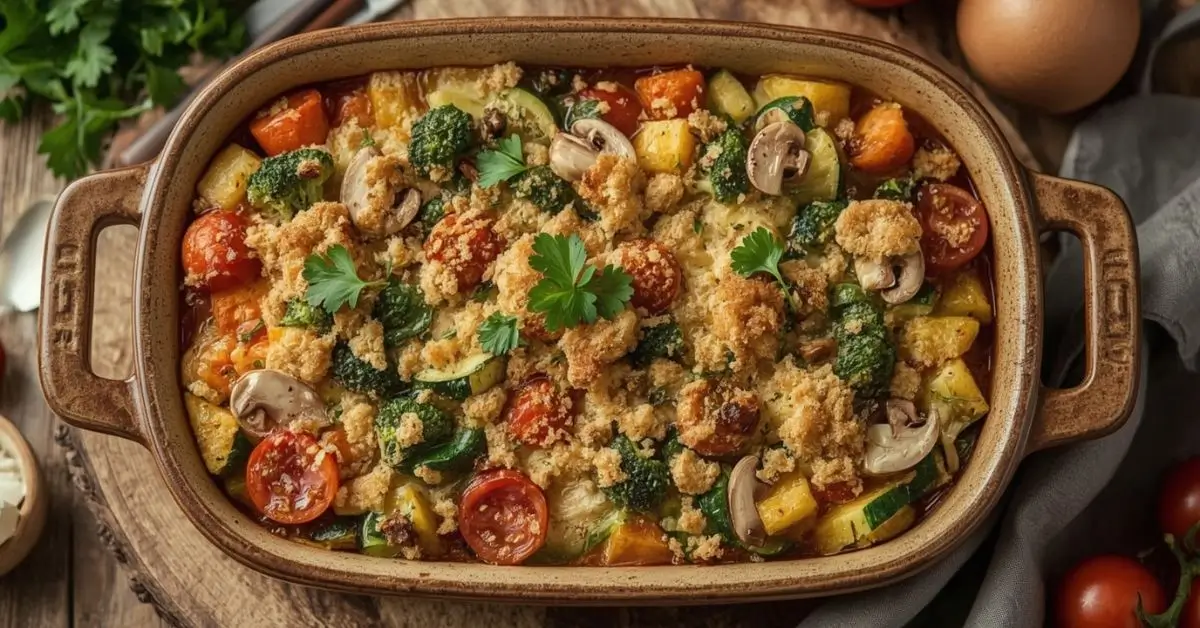
Finding the best vegan casserole isn’t just about swapping out meat or dairy. It’s about creating a dish that feels hearty, comforting, and satisfying enough to win over even the pickiest eaters. Many people assume casseroles lose their creamy, cozy charm when made plant-based—but the truth is, with the right ingredients, a vegan casserole can be richer, healthier, and even more flavorful than the traditional version.
Why Vegan Casseroles Are the Ultimate Comfort Food
Casseroles have always been about togetherness. They’re the dishes people bake for holidays, potlucks, or lazy Sundays. The best vegan casseroles carry the same spirit while being kinder to your body and the planet.
- Healthier ingredients → No heavy cream, processed cheese, or fatty meats.
- More inclusive → Perfect for vegans, vegetarians, lactose-intolerant, and health-conscious eaters.
- Budget-friendly → Beans, lentils, seasonal veggies, and grains stretch a meal further.
- Meal-prep magic → One casserole can feed a family for days or freeze for later.
One plant-based cook once tweeted: “Made a vegan lasagna casserole for my family… they asked for seconds before realizing there wasn’t a drop of cheese.” That’s when you know it’s working.
Vegan Comfort Food Recipes That Actually Satisfy
When people think of comfort food, they think of warmth, richness, and nostalgia. But comfort food doesn’t have to be heavy. Vegan comfort food recipes show that you can recreate those familiar flavors in a lighter, more nourishing way.
Vegan Mac and Cheese Casserole → Baked with cashew cream sauce and breadcrumbs.
Lentil Shepherd’s Pie → A classic comfort recipe turned plant-based, topped with creamy mashed potatoes.
Vegan Enchilada Casserole → Layers of tortillas, beans, salsa, and dairy-free cheese.
Vegan Breakfast Casserole → Tofu scramble with veggies baked into a hearty morning dish.
These dishes stick to your ribs while aligning with a plant-based lifestyle.
Easy Plant-Based Casseroles for Busy Weeknights
Cooking vegan doesn’t need to be complicated. Some of the easy plant-based casseroles can be prepped in 15 minutes, popped in the oven, and ready while you unwind.
Quick Ideas:
- Chickpea and spinach bake
- Sweet potato and black bean casserole
- Pasta al forno with dairy-free béchamel
- Quinoa and vegetable casserole
Think of them as your “dump, bake, and enjoy” recipes for hectic nights.
Healthy Vegan Dinner Ideas in Casserole Form
We often associate casseroles with indulgence, but they can also double as healthy vegan dinner ideas. By combining whole grains, vegetables, and legumes, you can make meals that are both nutrient-rich and deeply satisfying.
- Protein from lentils, tofu, and tempeh
- Fiber from beans, quinoa, and oats
- Micronutrients from colorful veggies
For example, a zucchini, chickpea, and brown rice casserole gives you balanced macros without feeling like diet food.
Dairy-Free Casserole Recipes That Still Taste Creamy
One of the most common questions is: “But how do you get that creamy texture without dairy?” The answer: clever swaps.
Cashew cream for sauces
Nutritional yeast for cheesy flavor
Coconut milk for richness
Plant-based cheese shreds for melting
These swaps make dairy-free casserole recipes just as indulgent as their traditional counterparts.
Vegetarian Baked Dishes That Go Beyond Basic
While all vegan casseroles are vegetarian, not all vegetarian baked dishes are vegan. Some use eggs or dairy. But the good news? Most vegetarian favorites can be fully veganized.
Think:
Baked eggplant parm (vegan mozzarella instead of dairy)
Mushroom and spinach lasagna (tofu ricotta)
Stuffed pepper casserole (lentils instead of ground beef)
This proves plant-based options don’t have to feel like “substitutes”—they stand strong on their own.
One-Pot Vegan Meals That Double as Casseroles
Why dirty multiple pans when you can whip up one-pot vegan meals that also work as casseroles?
Dump-and-bake quinoa with broccoli
One-pot lentil chili casserole
Rice and bean enchilada casserole
The beauty here is minimal cleanup and maximum comfort.
Gluten-Free Vegan Casserole Options
Many people searching for the best vegan casserole also need them to be gluten-free. Luckily, casseroles are versatile:
Swap pasta for brown rice pasta or zucchini noodles
Use gluten-free breadcrumbs or crushed cornflakes for topping
Try quinoa, millet, or buckwheat as the base
A gluten-free, dairy-free casserole is not only inclusive but also incredibly flavorful when seasoned well.
Plant-Based Family Dinners Everyone Can Enjoy
The casserole shines as the perfect family dinner. Instead of cooking multiple dishes to cater to different diets, you can create one plant-based dish that pleases everyone.
Kids love baked pasta and cheesy-tasting dishes. Adults appreciate hearty flavors without the food coma. A casserole bridges both worlds.
One home cook shared: “My husband used to complain about ‘vegan food’ until I served him a creamy potato and kale casserole. Now he asks for it weekly.”
High-Protein Vegan Recipes: Casserole Edition
Protein is the biggest concern for new vegans, but high-protein vegan recipes are easier than ever. Casseroles make it simple:
- Lentil lasagna → 18g protein per serving
- Tofu broccoli bake → 20g protein per serving
- Chickpea and quinoa casserole → 22g protein per serving
Adding beans, lentils, tofu, seitan, or tempeh boosts protein without losing flavor.
Cozy Vegan Comfort Dishes for Cold Nights
There’s nothing like a bubbling casserole on a rainy evening. These cozy vegan comfort dishes feel like a warm hug:
- Vegan pot pie casserole
- Creamy broccoli and rice bake
- Cheesy cauliflower casserole
- Sweet potato shepherd’s pie
These recipes lean into nostalgia—without the dairy or meat heaviness.
Pro Tips for Making the Best Vegan Casserole
Layer flavors → Don’t just toss ingredients; season each layer.
Use umami → Mushrooms, miso, soy sauce, and nutritional yeast deepen flavor.
Don’t skimp on texture → Crispy toppings like breadcrumbs or seeds make a difference.
Bake covered, then uncover → Keeps moisture inside, then crisps the top.
Make it ahead → Casseroles taste even better the next day.
FAQ’s
What is the best vegan casserole for beginners?
Start with a vegan pasta bake—it’s simple, customizable, and always a hit.
How do you make a vegan casserole creamy?
Cashews, blended tofu, coconut milk, and plant-based cheese create creaminess without dairy.
Can you freeze vegan casseroles?
Absolutely. Most vegan casseroles freeze well for up to 3 months, making them ideal for meal prep.
Are vegan casseroles healthy?
Yes, when made with whole grains, legumes, and fresh vegetables. They’re typically lower in fat than traditional casseroles.
Conclusion
The best vegan casserole doesn’t just taste amazing—it brings people together. From healthy vegandinner ideas to cozy comfort food recipes, these dishes prove that plant-based eating is flavorful, accessible, and perfect for any occasion.
-

 HEALTH8 months ago
Pure Clarity: The Power of Saline Contact Solution
-

 GENERAL9 months ago
Unveiling the 322 Messianic Prophecies: A Deep Dive
-

 TECHNOLOGY9 months ago
What happened to spank bang
-

 FASHION9 months ago
Debonair blog:The Art of Stylish Living
-

 ENTERTAINMENT9 months ago
What Is JerkMate? Exploring the Features and Purpose
-

 FASHION9 months ago
Understanding the Carmelita Neck: A Unique Fashion Detail
-

 ENTERTAINMENT9 months ago
Drake Exposed: The Untold Truth Behind the Music and Fame
-

 BUSINESS9 months ago
Crypto FintechZoom: Navigating the Future of Digital Finance