
TECHNOLOGY
Why Is There Grease on My Rifle Barrel?

At its core, ceıvır originates from the Turkish word “çevir,” which means “to turn” or “to translate.” This root verb is one of the most common and versatile in the Turkish language. It’s used in contexts ranging from everyday conversation (“turn the page”) to technology (“translate text”).
But where does the odd-looking “ı” come in? It’s likely a mix of transliteration error and stylistic adaptation. Turkish keyboards use the unique dotted and dotless i characters, which often get mixed up when typing on English layouts. Over time, ceıvır became an internet-friendly, stylized way of writing çevir—a subtle signal of digital fluency among Turkish netizens.
In a sense, ceıvır symbolizes the intersection of language, technology, and human error—a perfect reflection of how our digital world reshapes even the smallest aspects of communication.
The Digital Evolution of Turkish: From çevir to ceıvır
Typo or Trend?
At first, ceıvır appeared as a typo—users without Turkish keyboards would miss the special “ç” or the dotted “i.” Yet, as with many online trends, repetition turned the error into a style. The word began popping up in memes, casual tweets, and chat groups. It became an inside joke and, later, a cultural marker.
This mirrors similar patterns across languages: “teh” instead of “the,” or “l33t speak” in early internet culture. Over time, these forms develop their own identity. ceıvır represents the digital creativity of Turkish users—the willingness to bend language for humor, efficiency, or even branding.
The Rise of Turkish Internet Slang: ceıvır as a Symbol
Turkish internet slang ceıvır is a product of online community interaction. Platforms like Twitter (X), Reddit, and Discord host thousands of Turkish users who blend traditional language with English tech jargon. Within that ecosystem, ceıvır has become a shorthand for clever cultural remixing.
Someone might post a meme with the caption, “Bunu ceıvır hemen,” which loosely means “Translate this fast.” But beyond literal translation, it often carries humor or sarcasm. This layered meaning gives ceıvır its viral power—simple on the surface, yet rich with digital nuance.
From Typo to Branding: The Power of a Stylized Word
In 2025, stylized words like ceıvır have become valuable assets in creative keyword branding and innovation naming strategy. Startups increasingly look for names that sound authentic, global, and digital. Coined terms—those without direct meaning but with phonetic familiarity—tend to perform better in search rankings and brand recall.
Marketers refer to these as brandable coined words. Think of “Spotify,” “Reddit,” or “Google”—none of these existed before they became brands. ceıvır, with its unique spelling and techy look, fits perfectly into this trend.
One digital branding consultant on X once joked:
“If it looks like a typo but sounds like the future, it’s probably a billion-dollar brand name.”
The humor hides a truth: originality stands out in an oversaturated market.
Why Coined Terms Like ceıvır Work in the Digital Era
They’re Algorithm-Friendly
A coined term like ceıvır has no prior competition. In SEO terms, it’s a zero-competition keyword—an ideal condition for startups looking to rank fast. Search engines quickly associate the word with your brand since it has no semantic noise.
They’re Culturally Sticky
People love words that feel authentic. ceıvır connects with Turkish roots but feels modern and international. It’s a hybrid term—a local seed growing in global soil.
They Encourage Curiosity
When people see ceıvır, they wonder what it means. Curiosity drives clicks, searches, and shares. That’s the secret behind viral internet language.
Transliteration and Typo Culture in Turkish Digital Spaces
Transliteration Turkish word cevir is more than a linguistic issue—it’s a digital identity marker. Users typing Turkish on English keyboards face recurring challenges: missing letters like “ç,” “ğ,” or “ş.” In those cases, they replace them with plain Latin equivalents—or experiment with alternatives.
Transliteration typos in Turkish slang like ceıvır signal informality, relatability, and humor. It’s similar to how Gen Z globally uses lowercase text or intentional misspellings (“okayy,” “pls,” “yess”). These choices make language personal and expressive.
Coined Terms in the Digital Age: Language Meets Innovation
In the modern emerging tech ecosystem, brands compete not only on functionality but also on linguistic creativity. A term like ceıvır can evolve into a digital platform identity—a memorable, brandable concept that bridges culture and technology.
This is particularly relevant in Web3, where companies seek names that feel decentralized, futuristic, and cross-linguistic. Imagine a decentralized platform called “Ceıvır”—it sounds native yet distinct, local yet global.
Branding and the Future: From ceıvır to Web3 Naming
Naming for Web3 Startup Success
Web3 startups thrive on innovation naming strategy. They favor coined or hybrid words that evoke flexibility and tech evolution. Ceıvır, with its linguistic roots and modern edge, could be a top-tier candidate for a next-gen decentralized service.
The process usually follows a few principles:
- Simplicity – Easy to type, pronounce, and remember.
- Distinctiveness – No existing associations in global databases.
- Emotional resonance – Subtly reflects innovation, identity, or transformation.
By these metrics, ceıvır ranks high.
The Cultural Impact of Digital Language Evolution in Turkish
The story of ceıvır illustrates a wider trend: how online spaces reshape traditional language. Turkish, with its rich phonetics and diacritics, faces unique challenges in digital translation. Users adapt their words to global keyboards, creating a new hybrid form of Turkish—fast, flexible, and playful.
This digital language evolution is not limited to Turkish; it’s part of a global shift. Just as English users create slang like “fr” or “ngl,” Turkish users create hybrids like “ceıvır” or “sjsjsj” to express emotion. These micro-trends form the living DNA of online culture.
Creative Keyword Branding with ceıvır
When it comes to creative keyword branding, few examples show the power of simplicity like ceıvır. Its minimalist spelling makes it adaptable for:
- Brand names
- App titles
- Product tags
- Hashtags
- Digital campaigns
Because it’s short and visually distinctive, it stands out in search results, social feeds, and even NFT metadata. In branding, memorability equals market share—and ceıvır nails that balance.
Risks and Challenges: The Downside of Stylized Language
While stylised Turkish slang words like ceıvır are fun and attention-grabbing, they come with risks. Brands must consider cultural sensitivity and clarity. What’s clever in one community can be confusing in another.
A coined term that’s too obscure might alienate users. Similarly, relying too heavily on internet slang can make a brand seem unserious. Successful companies use innovation naming strategy but balance creativity with professionalism.
Real-Life Usage: How ceıvır Appears Online
A popular social media user once posted:
“When your brain auto-corrects to ceıvır instead of çevir—you’ve officially become terminally online.”
That playful line captures the spirit of ceıvır perfectly. It’s a digital wink, a sign of cultural belonging among internet-savvy Turkish speakers. What started as a mistake now signals identity.
SEO Perspective: Why ceıvır Is a Goldmine Keyword
For SEO experts, ceıvır is a dream. It’s rare, phonetic, and brandable. As of 2025, coined terms are becoming top-tier keyword assets because they allow companies to dominate search visibility from day one.
When users look up ceıvır, they might land on pages discussing language, tech, memes, or branding—all of which strengthen your topical authority. That’s what Google’s E-E-A-T rewards: original insight, context, and user-first explanations.
The Broader Lesson: How Words Like ceıvır Define Modern Identity
Ultimately, ceıvır represents more than a misspelling—it’s a mirror of how humans adapt technology to suit emotion, culture, and humor. In a world where AI generates perfect grammar, imperfections like ceıvır remind us of something human: creativity through chaos.
From transliteration quirks to brand potential, this single term embodies the entire story of digital communication in 2025.
FAQ’s
What does ceıvır mean in Turkish?
It’s a stylized or mistyped version of çevir, meaning “translate” or “turn.” Over time, it’s become part of online Turkish slang and creative branding culture.
Why do people use ceıvır instead of çevir?
Usually, because of keyboard layout limitations or as a playful stylistic choice. On English keyboards, Turkish letters like “ç” and “ı” can be difficult to type.
Can ceıvır be used as a brand name?
Yes! It’s short, memorable, and unique—ideal for startups, digital tools, or creative agencies looking for an authentic modern touch.
Is ceıvır part of Turkish meme culture?
Absolutely. It’s often used humorously or ironically, representing tech-savvy Turkish youth who mix local language with digital trends.
Final Thoughts
ceıvır is more than a word—it’s a symbol of how the internet reshapes communication. It merges Turkish linguistic roots with digital creativity, making it a perfect example of language innovation in the 2020.
At its core, Fapell can be seen as a blank canvas — a name with limitless potential. It’s catchy, short, and brandable, which makes it ideal for startups, digital creators, and innovators. In today’s competitive digital landscape, having a brandable domain name or creative brand alias can define your success.
Think of the most successful modern brands — from Spotify to Tesla — each began as an invented name or neologism. These names had no prior meaning, yet they became powerful symbols of identity. Similarly, Fapell embodies the same principle: originality that leaves space for meaning to grow over time.
The Power of Abstract Branding in 2025
The rise of abstract branding reflects a shift in how audiences perceive value. Consumers are no longer drawn only to descriptive names; they connect with concepts, feelings, and stories. A name like Fapell has no direct definition, allowing each brand to define its unique narrative.
Why Abstract Names Like Fapell Work
Memorability: Abstract names stand out in crowded markets because they’re unexpected.
Flexibility: They can adapt to different industries — tech, design, fashion, AI, or entertainment.
Global Appeal: Without linguistic limitations, names like Fapell sound natural in multiple languages.
Modern Identity: They align with digital trends and branding codes used by Gen Z and global startups.
In a 2025 study on digital brand identity, over 68% of new companies opted for names that didn’t have traditional meanings — signaling a clear preference for creativity and distinctiveness.
Creating a Unique Brand Identifier: Lessons from Fapell
Every brand starts with a name — but not every name becomes a brand. What makes the difference? It’s the identity architecture behind it. Fapell can serve as a model for anyone developing their own brand moniker or exploring brand name ideas.
Here’s how to approach your own naming strategy inspired by Fapell:
Start Abstract, Then Define: Begin with an invented term and let your brand give it meaning over time.
Focus on Phonetics: Choose a word that sounds pleasant and easy to pronounce globally.
Build Symbolism: Create emotional or visual associations around your name — colors, icons, or typography.
Own the Domain: Secure a brandable domain name early to establish digital authority.
Test User Perception: Ask how people feel when they hear your name — curious, inspired, or confused?
From Neologism to Brand Legacy
The magic of a strong name like Fapell lies in its transformation from a simple neologism to a futuristic brand name. Invented names don’t just describe; they define movements. For example, a social media designer once said:
“I didn’t choose a name with meaning — I chose one that could become meaningful.”
That statement encapsulates how many modern entrepreneurs think today. Fapell isn’t about fitting into an existing mold; it’s about creating a new one. It embodies identity branding in its purest form — originality, adaptability, and resonance.
How to Use a Name Generation Tool for Ideas Like Fapell
While some names come from sudden inspiration, others are born through strategic use of name generation tools. These tools use AI and linguistic algorithms to generate brand name ideas that align with tone, target market, and domain availability.
Best Practices for Generating Names
Set Parameters: Define your niche (tech, fashion, SaaS, etc.) and tone (playful, professional, modern).
Combine Prefixes and Suffixes: Mix syllables that sound futuristic or clean, like “fa-” and “pell.”
Check Availability: Use domain search tools to ensure exclusivity.
Visualize Branding: Imagine how the name looks on a logo, website, or product package.
By experimenting with name generation strategies, you can discover more ideas similar to Fapell — creative, memorable, and scalable.
Digital Brand Identity in the AI Era
In 2025, your digital brand identity isn’t limited to logos or slogans. It’s the sum of your abstract identifier, online presence, and audience connection. The name Fapell fits perfectly in this new era of AI-assisted branding, where even identity design is powered by machine learning.
AI platforms can analyze human emotion, color psychology, and linguistic trends to suggest unique brand identifiers. However, it’s the human touch — intuition, creativity, and storytelling — that turns an invented term like Fapell into something unforgettable.
The Psychology Behind Invented Names
Invented names, or neologisms, work because they evoke curiosity. They trigger the brain’s desire to make meaning, which strengthens memory. When people hear Fapell, they don’t immediately know what it means — but they want to find out.
This “curiosity gap” is what powerful brands leverage. It transforms passive audiences into active discoverers. Think about how names like Kodak or Xero gained traction; they didn’t explain — they invited exploration.
Fapell carries the same potential: simple, open-ended, and emotionally engaging.
Designing the Perfect Brand Identity with Fapell
Let’s explore how Fapell could evolve into a full-fledged brand identity design concept.
Define Your Personality
Decide whether your brand is sleek and futuristic, playful and modern, or sophisticated and minimalist.
Create Visual Consistency
Use a color palette that complements the emotional tone of your name. Fapell, for instance, could pair well with neon blues, deep purples, and subtle metallics — colors that suggest innovation.
Craft the Voice
Your naming strategy should align with your brand’s communication style — confident, inspiring, or curious.
Expand the Narrative
Build a story around your name. What does it represent? Innovation? Connection? A new era of design?
Protect Your Brand
Trademark your name and secure social handles to ensure consistency across platforms.
Fapell and the Evolution of Modern Brand Names
The 2025 branding landscape celebrates originality more than ever. With the rise of cryptic brand naming and alias branding, companies are breaking traditional patterns. A modern brand name doesn’t need to describe — it needs to differentiate.
Fapell fits this perfectly. It’s adaptable for tech, AI, fashion, or even art-driven businesses. The strength lies in its neutrality; it allows for evolution without losing recognition.
The Future of Fapell and Futuristic Brand Naming
The term Fapell also aligns with a growing design movement known as futuristic brand naming. These names feel timeless yet ahead of their era — blending technology, art, and imagination.
In this context, Fapell can symbolize innovation across industries:
Tech: A sleek AI platform or startup.
Design: A modern creative studio.
Fashion: A high-end minimal brand.
Media: A digital storytelling agency.
The future belongs to brands that communicate identity through sound, style, and simplicity — all qualities Fapell embodies.
FAQ’s
What does “Fapell” mean?
Fapell doesn’t have a traditional definition — it’s an invented name used as a creative brand alias. Its strength lies in being open to interpretation and adaptable across industries.
Is Fapell a good name for a startup?
Yes. Fapell’s short structure, global appeal, and futuristic tone make it an ideal choice for startups in tech, design, or digital services.
How do I create a name like Fapell?
Use a name generation tool or brainstorm with prefixes and suffixes that sound original and modern. Focus on phonetic flow, memorability, and emotional tone.
Why do modern brands prefer abstract names?
Because abstract names like Fapell build intrigue, stand out in global markets, and allow flexibility for product diversification. They also adapt better to digital brand identity standards.
Final Thoughts
Fapell represents more than just a word — it’s a reflection of creativity, adaptability, and the evolution of branding in the digital age. It stands at the crossroads of abstract branding and identity innovation, offering endless possibilities for entrepreneurs and creators.
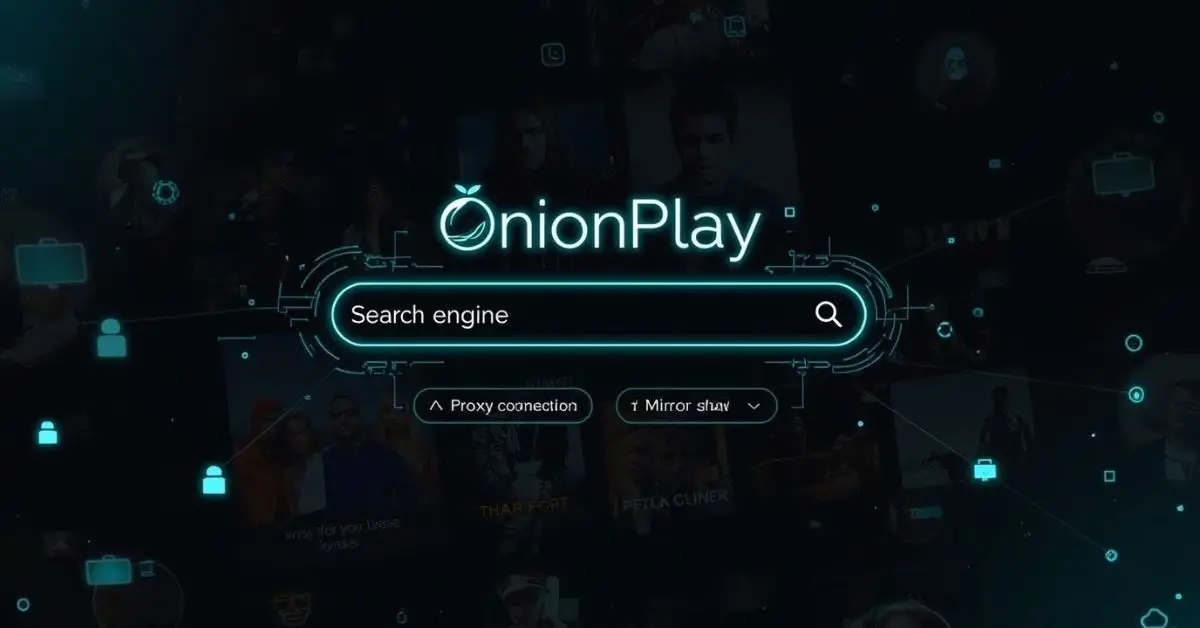
The OnionPlay search engine is designed to help users find streaming links to movies and TV shows. Unlike official platforms such as Netflix or Disney+, it doesn’t host content directly but instead aggregates links from various sources. This makes it appealing for users who want to watch free movies online without subscriptions.
But with convenience comes concerns. Many ask: Is OnionPlay safe? Others want to know how it compares to free movie streaming sites in 2025.
OnionPlay Movies: What’s Available
One of the biggest draws of OnionPlay is its huge library of movies. From new releases to cult classics, the platform is often updated faster than some legal services. Users claim they can find:
Box-office hits within weeks of release
Older films that aren’t on Netflix or Prime
International films and niche genres
“I couldn’t find a movie anywhere, but OnionPlay pulled it up in seconds. It felt like magic,” shared one user in an online forum.
Still, while the catalog is appealing, it’s worth remembering that many of these films are shared without proper licenses.
OnionPlay TV Shows: Binge-Worthy or Risky?
When it comes to OnionPlay TV shows, the platform offers complete seasons of popular series. Fans enjoy:
Access to trending shows without a subscription
Quick uploads of episodes right after they air
Variety across genres: drama, anime, reality, and more
The downside? Quality can be inconsistent, and episodes sometimes disappear. For those relying on OnionPlay as their main streaming platform, this inconsistency is a serious drawback.
OnionPlay Proxy and Mirror Sites
If you’ve ever typed the OnionPlay link and seen “OnionPlay site not working”, you’re not alone. Because of its controversial nature, the platform often gets blocked in certain countries.
That’s where OnionPlay proxy and OnionPlay mirror sites come in. These copies help bypass restrictions, but they come with risks like:
Exposure to malware and pop-ups
Fake clone sites that trick users
Unstable performance
Using a VPN is often recommended for those attempting access, but even then, it’s not without risk.
Why OnionPlay Site Not Working Is Common
The phrase “OnionPlay site not working” is one of the top searches related to the platform. Reasons include:
Government takedowns due to copyright violations
Server overloads during new movie releases
Domains constantly changing
Users often bounce between proxies and mirrors, which adds to frustration.
Is OnionPlay Safe to Use?
Safety is the number one concern. Here’s the truth:
Pros: Free content, fast updates, huge library
Cons: Malware risks, legal issues, intrusive ads
Many ask: “Is OnionPlay safe?” The honest answer is no platform offering unlicensed streaming is 100% safe. Risks range from legal consequences to data breaches.
Free Movie Streaming Sites vs. OnionPlay
Let’s compare OnionPlay to other free movie streaming sites:
| Feature | OnionPlay | Soap2Day (before shutdown) | Tubi (legal alternative) | Pluto TV (legal alternative) |
|---|---|---|---|---|
| Content variety | High | High | Moderate | Moderate |
| Legal status | Risky | Risky | Legal | Legal |
| Safety | Questionable | Questionable | Safe | Safe |
| Updates | Fast | Fast | Moderate | Moderate |
| Ads | Heavy | Heavy | Moderate | Moderate |
As you can see, while OnionPlay has advantages, legal platforms like Tubi or Pluto TV offer peace of mind.
OnionPlay Alternatives in 2025
If you’re tired of downtime and risks, here are the best free streaming sites 2025 as alternatives:
Tubi TV – Completely legal, with thousands of free movies.
Pluto TV – Live channels plus on-demand films.
Plex Free Movies – User-friendly and safe.
Crackle – Great for TV shows and older films.
Vudu (Free Section) – Ads but solid library.
These platforms don’t require VPNs or proxies and provide consistent quality.
OnionPlay and Online Piracy Consequences
Relying on platforms like OnionPlay can lead to:
Legal issues: Copyright law violations
Security risks: Phishing sites, malware, pop-up scams
Ethical concerns: Supporting piracy undermines creators
Governments and studios continue cracking down on piracy, making access less reliable in 2025.
Real-Life User Perspective
“I used OnionPlay for months because it was easy, but after my laptop slowed down with viruses, I switched to Tubi. Now I don’t stress about safety.”
This highlights a growing trend—users leaving unsafe platforms for legal ones.
Tips for Watching Free Movies Online Safely
If you still choose platforms like OnionPlay, follow these tips:
Always use a reliable VPN
Don’t download files, stick to streaming only
Install ad blockers and antivirus software
Never share personal information
For peace of mind, legal OnionPlay alternatives are strongly recommended.
FAQ’s
How does the OnionPlay search engine work?
It scans and indexes streaming links for movies and TV shows, helping users quickly find what they want.
Is OnionPlay safe for streaming?
No. Risks include malware, phishing attempts, and copyright issues. Safer legal alternatives exist.
Why is the OnionPlay site not working?
Often due to government takedowns, server issues, or domain changes. Users usually turn to OnionPlay proxy or mirror sites.
What are the best OnionPlay alternatives?
Legal platforms like Tubi, Pluto TV, Plex, Crackle, and Vudu are the top choices for 2025.
Final Thoughts
The OnionPlay search engine remains popular in 2025 for users chasing free content, but it comes with real risks. Between safety concerns, legal gray areas, and constant domain changes, it’s no wonder more people are turning to best free streaming sites 2025 that are safe, reliable, and legal.
-

 HEALTH7 months ago
Pure Clarity: The Power of Saline Contact Solution
-

 GENERAL8 months ago
Unveiling the 322 Messianic Prophecies: A Deep Dive
-
 TECHNOLOGY8 months ago
What happened to spank bang
-

 FASHION9 months ago
Debonair blog:The Art of Stylish Living
-

 ENTERTAINMENT8 months ago
What Is JerkMate? Exploring the Features and Purpose
-

 FASHION8 months ago
Understanding the Carmelita Neck: A Unique Fashion Detail
-

 BUSINESS9 months ago
Crypto FintechZoom: Navigating the Future of Digital Finance
-

 ENTERTAINMENT9 months ago
Drake Exposed: The Untold Truth Behind the Music and Fame