Connect with us

EDUCATION

What is GTP Education?

Published

on

what is a gtp education

What is GTP Education? A Comprehensive Guide

GTP (Graduate Teacher Program) education is a specialized training pathway designed to prepare individuals for a career in teaching. It aims to provide practical experience, pedagogical knowledge, and subject expertise to aspiring educators. This article will explore what GTP education entails, how it works, and why it is an excellent option for those looking to enter the teaching profession.

Understanding GTP Education

Graduate Teacher Programs (GTP) are designed for individuals who have completed a university degree and wish to transition into teaching. These programs typically focus on equipping candidates with the necessary skills, knowledge, and qualifications to become effective teachers. GTP education is a popular route for those looking to teach in schools, particularly in countries like the United Kingdom, Australia, and New Zealand.

The Basics of GTP Education

A Graduate Teacher Program (GTP) is an initial teacher training (ITT) program that is generally undertaken after completing a university degree. It provides graduates with the practical experience and theoretical foundation required to teach in schools. The GTP pathway involves both in-school placements and academic coursework, making it a comprehensive approach to teacher development.

In GTP education, candidates work under the supervision of experienced mentors while attending training sessions to build their teaching competencies. Upon successful completion of the program, participants are awarded Qualified Teacher Status (QTS), which is a requirement to teach in many countries.

Why Choose GTP Education?

GTP education offers several advantages for aspiring educators. Below are some of the primary benefits of choosing this path:

  • Practical Experience: GTP candidates spend a significant amount of time in schools, gaining hands-on teaching experience. This real-world exposure allows them to develop confidence and teaching strategies.
  • Earn While You Learn: Many GTP programs offer a salary while candidates work in schools, making it an attractive option for those who prefer to earn money during their training.
  • Personalized Mentorship: Participants receive guidance and mentorship from experienced teachers, helping them refine their skills and build a strong professional network.
  • Fast-Track to Qualification: GTP programs typically take one year to complete, making them a quicker route to becoming a qualified teacher compared to other routes, such as traditional university-based education degrees.

How Does GTP Education Work?

The GTP education process varies slightly depending on the country, but there are key components that are generally consistent across programs.

1. Academic and Practical Training

GTP candidates typically spend part of their time in the classroom, engaging with students and applying the teaching methods they learn in their coursework. Simultaneously, they participate in seminars, workshops, and academic training sessions that cover various aspects of teaching, such as:

  • Classroom management
  • Teaching pedagogy
  • Curriculum planning
  • Assessment strategies
  • Subject-specific knowledge

This blend of practical experience and academic learning is essential in helping candidates develop the skills needed to become effective educators.

2. Mentorship and Support

Throughout the GTP program, candidates are supported by experienced mentor teachers. These mentors provide feedback, guidance, and advice to help candidates refine their teaching techniques and overcome any challenges they face. Mentorship is a vital part of the program, as it helps bridge the gap between theoretical learning and practical application.

3. School Placements

One of the unique features of GTP education is the in-school placements. Candidates spend a significant amount of time teaching in a school environment, which helps them develop their classroom management skills and understand the dynamics of different educational settings. Placements are designed to give candidates real-world teaching experience, allowing them to work with students of various ages and backgrounds.

4. Assessments and Evaluation

Throughout the GTP program, candidates undergo assessments to evaluate their progress. These assessments can include observations of their teaching, written assignments, and reflective journals. The goal of these evaluations is to ensure that candidates meet the required standards and are ready to become qualified teachers.

5. Obtaining Qualified Teacher Status (QTS)

Upon successful completion of the GTP program, candidates are awarded Qualified Teacher Status (QTS). This certification is required in many countries to teach in primary and secondary schools. Achieving QTS is a key milestone in a teacher’s career and demonstrates that they have met the necessary standards for teaching.

GTP Education Pathways

There are various pathways within the GTP education system, depending on the individual’s background and career goals. Below are some of the main pathways:

1. Primary Education

The primary education pathway in GTP focuses on preparing candidates to teach young children, typically between the ages of 4 and 11. This pathway requires candidates to develop a broad understanding of various subjects, including mathematics, literacy, science, and arts.

2. Secondary Education

Secondary education pathways are for individuals who wish to teach students in high school (ages 11-18). Candidates in this pathway will focus on teaching specific subjects such as English, mathematics, science, or history. They need to have a deep understanding of their subject area and the ability to create engaging lessons for older students.

3. Special Educational Needs (SEN)

Some GTP programs specialize in training teachers for working with students who have special educational needs (SEN). These programs teach candidates how to adapt their teaching methods to meet the diverse needs of students with learning disabilities, physical disabilities, or behavioral challenges.

GTP Education vs. Other Teacher Training Programs

While GTP education is an excellent pathway into teaching, it’s essential to understand how it compares to other teacher training programs.

1. GTP vs. PGCE (Postgraduate Certificate in Education)

In some countries, such as the UK, aspiring teachers have the option to pursue a Postgraduate Certificate in Education (PGCE) instead of a GTP program. Both GTP and PGCE programs aim to achieve the same outcome: preparing graduates to become qualified teachers. However, the primary difference is that the GTP program is typically a more school-based route, with candidates working in schools from day one, whereas PGCE programs tend to be more academic and university-based.

2. GTP vs. Traditional University Degrees

Traditional university degrees in education typically take three to four years to complete and include both academic coursework and some teaching placements. GTP education, on the other hand, is often a faster, more direct route to qualifying as a teacher. While university degrees in education provide a broader theoretical understanding of teaching, GTP programs focus more on practical experience and on-the-job training.

Is GTP Education Right for You?

GTP education is an ideal option for individuals who are passionate about teaching and want to gain practical experience in the classroom. It’s also well-suited for those who are looking to transition into teaching after completing a university degree in a different field. GTP education offers a unique opportunity to work alongside experienced teachers, receive mentorship, and earn a salary while training.

However, it’s important to consider your career goals, preferred learning style, and available resources before committing to a GTP program. Some individuals may prefer a more academic route, such as a PGCE or university-based education degree, while others may thrive in the hands-on, school-based approach of GTP education.

Conclusion

GTP education is an excellent option for those looking to become qualified teachers in a relatively short amount of time. By combining academic learning with practical classroom experience, the program equips graduates with the skills, knowledge, and confidence needed to succeed in the teaching profession. Whether you’re looking to teach primary, secondary, or special educational needs students, GTP education provides a pathway to a fulfilling career in education.

If you’re considering a career in teaching, GTP education’s offers a streamlined, hands-on approach that helps you develop the essential skills required to inspire and educate the next generation of students.

Continue Reading
Click to comment

Leave a Reply

Your email address will not be published. Required fields are marked *

EDUCATION

Reimagining Learning with Classroom 30X

Published

on

Classroom 30X

Reimagining Learning with Classroom 30X

Integrating smart technology into education transforms traditional environments into dynamic, interactive learning hubs. Classroom 30X ushers in digital whiteboards, AI-powered analytics, blended learning strategies, and flexible seating to enhance student engagement and personalize instruction through adaptive tools and immersive content.

The Vision Behind Classroom 30X

Classroom 30X’s represents more than a tech upgrade—it’s a pedagogical shift toward student-centered learning spaces. This model blends physical infrastructure with learning management systems (LMS), interactive displays, and cloud-based analytics to create engaging environments. The traditional teacher-led model evolves into a facilitator-guided ecosystem that supports project-based learning, flipped classroom models, and collaborative problem-solving using digital tools like Google Workspace and PhET simulations.

Smart Displays & Interactive Whiteboards

A hallmark of Classroom 30X is the installation of interactive whiteboards or smartboards that enable touch-based engagement on a large scale. Students can annotate lessons, manipulate multimedia, and collaborate in real time. Research suggests that interactive displays significantly boost participation and retention by fostering active learning .

https://s47295.pcdn.co/wp-content/uploads/2021/09/interactive-display-flip-wm85r-education-hybrid-5.jpeg
https://www.i3-technologies.com/media/yqqkblqy/21090301rep0017-1.jpg
https://community.connection.com/wp-content/uploads/2025/02/2924085-Samsung-PSG-WAF-BLOG.jpg

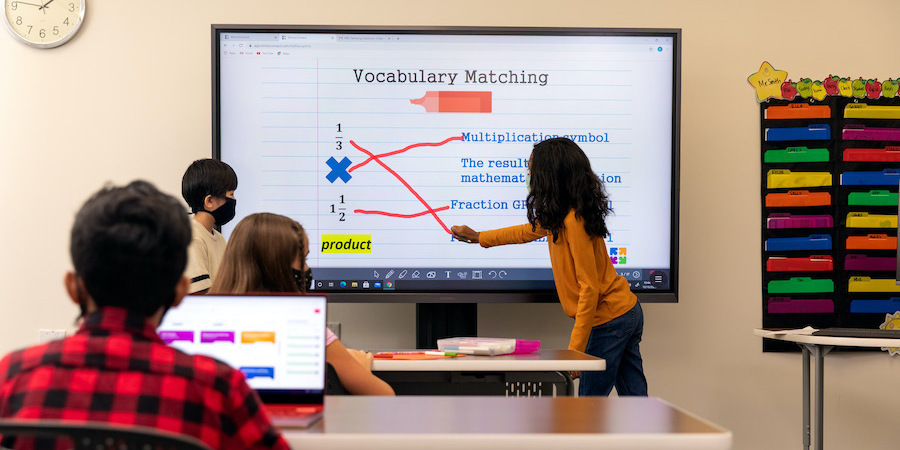
These images illustrate modern touch-enabled classrooms with teachers guiding digitally interactive lessons.

Digital Infrastructure & Hybrid Connectivity

Effective implementation of Classroom 30X depends on robust digital infrastructure—high-speed Wi‑Fi, cloud storage, and learning analytics dashboards. This backbone supports synchronous lessons via video conferencing equipment like PTZ cameras and VoIP systems, integrating both in-person and remote learners in a blended learning environment .

Personalized & Adaptive Learning

With adaptive platforms built into Classroom 30X, students receive customized lessons based on performance data. Real-time analytics (via integrated LMS dashboards) help identify struggling learners and deliver tailored content, reflecting principles of mastery learning and adaptive assessment . For example, a math student can automatically be redirected to extra tutorials when their assessment shows gaps.

Gamification & Simulation Tools

Engagement is further boosted through gamified learning environments and interactive simulations like PhET. These tools encourage experimentation in virtual labs, enhancing critical thinking and retention. This aligns with Classroom 30X’s goal of fostering real-world problem-solving skills .

https://static.archerdxp.io/cms/b7dd40dd-819a-4659-941d-bfa193c3864d.jpg
https://qnextech.com/wp-content/uploads/2023/03/%E6%95%99%E5%AE%A4%E5%9C%BA%E6%99%AF.jpg

These images show students engaging with laptops and collaborative smart tables—key elements in tech‑forward classrooms.

Flexible Room Design & Seating

The physical layout of Classroom 30X promotes interaction. Modular desks, mobile whiteboards, and flexible seating configurations support group projects, peer-led discussions, and easy transition between instructional modes

 Such adaptability encourages collaboration and efficient utilization of interactive tools.

Embedded Video: Examples in Action


Challenges & Considerations

Despite its benefits, Classroom 30X faces hurdles. The digital divide can hinder equitable access, particularly in low-resource districts

Teachers need thorough professional development to leverage these tools effectively. There’s also the risk of screen fatigue, making it critical to balance digital and offline activities . Finally, schools must establish robust data privacy and security policies to protect student information.

Future Trends: AI, AR, and Beyond

Looking ahead, Classroom 30X is poised to incorporate AI tutors, augmented reality (AR), and immersive holographic setups. Innovations like HoloBoards promise richer engagement and interactive lectures  Edge computing and behavior recognition tools are also emerging, supporting advanced adaptive learning and teacher feedback systems .

FAQs

Q: What exactly does “30X” mean in Classroom 30X?
A: It refers to scaling up engagement and learning impact across a class of 30 students through integrated technology, pedagogy, and analytics .

Q: How does Classroom 30X support remote learners?
A: Powered by hybrid learning setups—like PTZ cameras and video conferencing—it enables seamless participation for both in‑person and online students.

Q: Do schools need advanced budgets to implement it?
A: Not necessarily. Schools can phase in tools, starting with mid-range smartboards and open‑source LMS, while building digital capacity over time .

Q: What role do teachers play in Classroom 30X?
A: Teachers transition into facilitators, guiding inquiry-based learning, interpreting analytics, and fostering student collaboration.

Q: Does AR/AI play a role in Classroom 30X?
A: Yes—future implementations include AR for immersive study and AI that adapts curriculum and assists with assessment.

Conclusion

Classroom 30X reimagines learning by blending interactive displays, adaptive analytics, flexible design, and gamified tools to foster a future-ready, student‑centered classroom. By balancing technology with pedagogical integrity, addressing equity, and prioritizing teacher development, it promises not just enhanced performance but a vibrant, engaging educational experience.

ALSO READ MORE

Continue Reading

EDUCATION

Mastering Anatomy: Effective Study Tips for Exam Success

Published

on

how to study for an anatomy exam

Mastering Anatomy: Effective Study Tips for Exam Success

Anatomy exams can be some of the most challenging tests that students face, particularly for those pursuing careers in healthcare and related fields. The complexity of the human body, coupled with the vast amount of information that needs to be retained, can make studying for an anatomy exam overwhelming. However, with the right study strategies, you can break down the material and master it efficiently. This article provides effective study tips for anatomy exams, helping you not only pass but excel.

Understanding the Anatomy Exam: What to Expect

Before diving into study strategies, it’s essential to know what to expect in your anatomy exam. Anatomy exams generally assess your knowledge of the body’s structure, including organs, muscles, bones, tissues, and systems, often through written tests, lab practicals, or a combination of both.

  1. Written Exams: These typically involve multiple-choice questions, short-answer questions, and essays that test your knowledge of anatomical terms, structures, and their functions.

  2. Lab Practicals: In some cases, you may have to identify structures on cadavers, models, or diagrams, making hands-on learning crucial for success.

  3. Terminology and Concepts: Anatomy exams often require familiarity with complex terms and concepts, which makes memorization and understanding foundational.

Top Tips for Effective Anatomy Study

To perform well in your anatomy exam, it’s important to adopt study methods that promote active learning and deep understanding. Here are several proven strategies to help you succeed:

1. Break Down the Material Into Manageable Chunks

Anatomy is a vast subject that covers numerous systems and structures. Trying to study it all at once can lead to burnout and confusion. Instead, break down your study material into manageable chunks, focusing on one system or section at a time. For example:

  • Week 1: Skeletal System

  • Week 2: Muscular System

  • Week 3: Nervous System

  • Week 4: Cardiovascular System, etc.

Focusing on one body system at a time allows you to understand the interrelationships between structures and functions, making the material less overwhelming.

2. Use Active Learning Techniques

Active learning is the process of engaging with the material through various methods rather than passively reading or watching. Here are some active learning strategies for anatomy:

Flashcards for Terminology and Structures

Flashcards are an excellent tool for memorizing anatomical terms and structures. You can create physical or digital flashcards, using one side for a term (e.g., “femur”) and the other side for its definition, function, or location. Tools like Anki or Quizlet are great for creating digital flashcards with spaced repetition, which helps with long-term retention.

Teach What You Learn

One of the most effective ways to solidify your understanding of a topic is by teaching it to someone else. Try explaining anatomical concepts to a classmate, friend, or even a family member. This process will help you identify gaps in your knowledge and reinforce the material.

Practice with Diagrams and Models

Anatomy is a visual subject. Use diagrams, 3D models, and even online resources to familiarize yourself with the structures you need to know. Label the parts of the body, organs, or muscles and practice identifying them until you can do it without looking at the names.

Engage in Active Recall

Active recall involves testing yourself on the material rather than just reviewing it. After you’ve studied a section, close your book and try to recall the structures or terms you just learned. This technique strengthens memory retention and helps prepare you for the actual exam.

3. Incorporate Spaced Repetition for Long-Term Retention

Spaced repetition is a scientifically backed technique that involves reviewing material at increasing intervals over time. Rather than cramming the night before the exam, use spaced repetition to review anatomy concepts periodically. For example:

  • Day 1: Learn new material.

  • Day 3: Review.

  • Day 7: Review again.

  • Day 14: Review once more.

By revisiting the material at spaced intervals, you reinforce your memory, preventing forgetting and ensuring long-term retention. You can use apps like Anki or Quizlet, which automatically schedule spaced repetition for you.

4. Create Study Aids and Visuals

Anatomy requires you to visualize complex structures and systems, so creating your own study aids can be incredibly helpful. Some study tools include:

Custom-made Charts or Maps

Create charts, maps, or diagrams of body systems, highlighting important structures. For example, you could create a chart that shows the relationship between muscles, bones, and tendons or a diagram of the circulatory system.

Color-Coding

Color coding is a simple but effective way to organize anatomical information. For example, use one color to mark all bones, another for muscles, and a third for nerves. This visual association can help you recall structures more easily during your exam.

Mnemonics and Acronyms

Mnemonics are memory aids that can help you remember complicated anatomical terms. For example, for cranial nerves, students often use the phrase “Oh, Oh, Oh, To Touch And Feel Very Green Vegetables, AH!” to remember the order of the cranial nerves (Olfactory, Optic, Oculomotor, etc.).

5. Focus on Understanding, Not Just Memorization

While memorization is a big part of anatomy, understanding the relationships between body structures is equally important. Rather than simply memorizing isolated terms or locations, try to connect new information to what you already know. For instance:

  • How do muscles interact with bones in terms of movement?

  • What role do specific nerves play in controlling body functions?

  • How does the cardiovascular system interact with the respiratory system?

These connections will not only help you recall the material but also allow you to apply your knowledge in practical settings, such as clinical scenarios or in practical exams.

6. Take Regular Breaks and Stay Organized

Studying for anatomy exams requires focus and discipline, but it’s equally important to take regular breaks to avoid burnout. Use the Pomodoro Technique, which involves studying for 25 minutes and then taking a 5-minute break. After four cycles, take a longer break of 15–30 minutes.

Additionally, staying organized will keep you on track. Keep a study schedule, and ensure you cover all systems before your exam. Having a checklist or a study planner can help you visualize your progress and reduce last-minute cramming.

7. Use Online Resources and Apps

In addition to traditional textbooks and study guides, several online resources and apps can enhance your study efforts:

  • Visible Body: This 3D app allows you to explore anatomical structures in a highly detailed and interactive manner.

  • Kenhub: Offers anatomy tutorials, quizzes, and diagrams to help reinforce your learning.

  • YouTube Channels: Channels like “AnatomyZone” provide video tutorials that break down complex concepts in an engaging and digestible manner.

By leveraging these tools, you can enhance your understanding and visualize anatomy in a more dynamic way.

8. Stay Positive and Manage Stress

Anatomy exams can be stressful, but maintaining a positive attitude and managing stress effectively can significantly impact your performance. Here are a few stress-management strategies:

  • Exercise: Physical activity can reduce stress, improve focus, and enhance memory retention.

  • Mindfulness: Techniques such as deep breathing, meditation, or yoga can help you stay calm and focused during study sessions.

  • Adequate Sleep: Never underestimate the power of a good night’s sleep. Sleep is crucial for consolidating memories and retaining information.

Conclusion: Your Roadmap to Success in Anatomy Exams

Mastering anatomy for an exam requires more than just rote memorization—it demands a strategic approach that includes active learning, understanding concepts, and using efficient study techniques. By breaking down the material into manageable chunks, utilizing active recall, incorporating spaced repetition, and leveraging visual aids, you can set yourself up for success.

Remember, studying for anatomy exams is a marathon, not a sprint. Stay organized, keep a positive mindset, and continuously engage with the material to build your knowledge over time. With these study tips, you’ll not only pass your anatomy exam but also gain a deeper understanding of the fascinating human body.

Continue Reading

EDUCATION

What Time Does Shabbat End? Understanding the Exact Moment

Published

on

what time does shabbat end

What Time Does Shabbat End? Understanding the Exact Moment

What time does shabbat end? Shabbat is one of the most significant and cherished observances in Judaism, offering a time of rest, reflection, and connection with family, friends, and God. It begins at sunset on Friday evening and lasts until the appearance of three stars in the sky on Saturday night. However, for those who observe Shabbat, determining the exact moment it ends can be a bit complex. In this article, we will dive into how to determine the time Shabbat ends, the significance of this moment, and what to consider when marking the conclusion of this holy day.

What is Shabbat?

Shabbat is the Jewish day of rest, commanded in the Torah (the Jewish Bible), where the Jewish people cease from their work and engage in spiritual practices, meals, prayers, and spending time with loved ones. It is observed from Friday evening until Saturday night, during which time Jews refrain from engaging in various forms of labor, in line with the commandment to “remember the Sabbath day and keep it holy” (Exodus 20:8).

The beginning of Shabbat is clearly defined as sunset on Friday evening, and it is concluded when three stars become visible in the night sky on Saturday. This marks the transition from the sacred day of Shabbat back to the ordinary weekdays.

When Does Shabbat End?

The end of Shabbat is traditionally determined by the appearance of three stars in the sky, signaling the nightfall. While this sounds simple, determining the exact time can vary based on location, time of year, and interpretation of Jewish law.

The Three-Star Rule

The “three stars rule” refers to the appearance of three medium-sized stars in the sky, which are considered visible when the sun has sufficiently set below the horizon. Once these stars are visible, the time of Shabbat’s conclusion is reached, and Jewish law allows for the resumption of regular weekday activities.

The reason why three stars mark the end of Shabbat is rooted in Jewish tradition and Talmudic law. The Talmud (Shabbat 34b) discusses how this is the general sign of nightfall. It’s important to note that this is not a specific hour, and the time varies depending on the season, geography, and local weather conditions. This is why many Jews rely on published times for the end of Shabbat in their area.

Time Variation Based on Location

Since Shabbat ends based on when three stars are visible, the exact time varies based on location. For example, in places closer to the equator, where the sun sets more quickly, Shabbat might end slightly earlier. In contrast, places further north or south may experience longer twilight periods, leading to a later time for Shabbat’s conclusion.

The Jewish calendar takes these variations into account by providing local times for candle lighting on Friday and the end of Shabbat on Saturday. The time difference can be as little as 30 minutes or as much as an hour or more, depending on where one is in the world.

Factors Affecting Shabbat’s Conclusion

Several factors affect when Shabbat officially ends. These include:

1. Geographical Location

  • The time zone and geographical location determine how quickly the sun sets and when stars are visible in the sky. Jews living in different parts of the world will experience different sunset times and, by extension, different times for the conclusion of Shabbat.

2. Time of Year

  • The time of year plays a significant role, as the earth’s tilt causes varying lengths of twilight in different seasons. For example, during the summer months, there is a longer twilight, meaning it takes longer for three stars to appear. In the winter months, the twilight period is much shorter.

3. Halachic Interpretations

  • Jewish law, or Halacha, provides guidelines for determining the end of Shabbat. However, there is some debate within different Jewish communities regarding the specific time. Some interpret nightfall to occur a bit later than others, particularly when taking into account the varying levels of twilight in different locations.

4. Tzeit HaKochavim (Emergence of Stars)

  • The exact time that three stars appear is known as “Tzeit HaKochavim,” and this can differ slightly depending on how clear the sky is, and the horizon’s visibility. In urban areas with high light pollution, it may be harder to see stars, requiring some to follow an estimated time published by local authorities.

How Do You Determine the Exact Time Shabbat Ends?

1. Using Jewish Calendars or Apps

The easiest way to determine the exact time Shabbat ends is by referring to a Jewish calendar, which provides accurate information for your area. These calendars list the times for candle lighting on Friday night and the end of Shabbat on Saturday night. Many Jewish websites and apps, such as “MyZmanim” and “Chabad.org,” allow you to enter your location and provide you with the specific time for Shabbat’s end.

2. Zmanim (Halachic Times)

Zmanim refers to the times according to Jewish law. For example, one common practice is to end Shabbat approximately 72 minutes after sunset, allowing for the three stars to appear. This 72-minute window is known as “Tosefet Shabbat” and ensures that there is ample time after sunset for nightfall to occur.

3. Following Local Synagogue Times

Many synagogues will also provide information about when Shabbat ends in their local community. These times are often based on the Zmanim for the area, providing a reliable way for members to know when they can resume activities after Shabbat.

4. Consulting a Local Rabbi

In communities without access to digital resources, consulting a rabbi or knowledgeable community member is a great option. They can provide precise, locally informed times for the conclusion of Shabbat.

What to Do After Shabbat Ends

The conclusion of Shabbat is marked by the Havdalah ceremony, which involves reciting prayers over a cup of wine, smelling spices, and lighting a special braided candle. This marks the distinction between the sanctity of Shabbat and the ordinary days of the week. After the Havdalah, people traditionally resume their work and other weekday activities.

The Significance of Shabbat’s End

While Shabbat is a day of rest and spiritual enrichment, its conclusion is also a time for reflection. The transition from Shabbat back to the regular workweek can serve as an opportunity for Jews to carry forward the peace and holiness of Shabbat into their daily lives. The end of Shabbat serves as a reminder that both the rest and labor in life should be balanced.

Why Is the Exact Time Important?

For many observant Jews, the exact moment Shabbat ends is crucial for several reasons:

  1. Halachic Adherence: The observance of Jewish law requires precision in determining when Shabbat concludes. Violating this timing can result in the resumption of activities before the sacred day has ended.

  2. Family and Community Practices: The end of Shabbat is often a communal time, where people gather for Havdalah or have family dinners. Knowing when to start this transition ensures that everyone can participate in this ritual.

  3. Respecting the Holiness of Shabbat: By waiting until the proper time for Shabbat to end, Jews show respect for the sanctity of the day, ensuring that they fully observe all of its laws and rituals.

Conclusion

Determining the exact time that Shabbat ends can be complex due to various factors such as geographical location, time of year, and Halachic interpretations. However, by using resources such as Jewish calendars, apps, and local synagogue times, one can easily find the precise moment to conclude Shabbat. Whether you follow the traditional three-star rule or rely on local guidelines, understanding when Shabbat ends ensures that you honor this holy day correctly, marking the transition back into the regular week with respect and spiritual intention.

ALSO READ

Continue Reading

Trending